Architectural Drawing & Rendering Tutorials
Architectural drawing and rendering are crucial skills for architects and designers. These are our essential tools for visually communicating ideas and design concepts, whether for a client presentation or a personal design project. Our tutorials are available to help you improve your drawing/rendering skills and develop your own unique style. We hope you find our content informative, engaging, and inspiring, and we look forward to helping you develop your skills as an architectural sketch artist.
Please feel free to send us feedback! Your questions and comments will help us all.
iPad Sketch Drawing
Setup and Process
Procreate Tutorial for Architectural Illustration
It's important to note that there are pros and cons to both drawing “digitally” and “traditionally,” and ultimately it comes down to personal preference and the specific project or task at hand. That being said, while digital drawing on an iPad may not involve the use of physical materials like paper and pencils, it is still a form of traditional drawing in the sense that the artist is using their skills and creativity to create a visual representation of their ideas. The process of sketching, refining, and perfecting a drawing on an iPad is similar to the process of drawing by hand, and many artists consider it to be a natural extension of their traditional drawing skills.
Furthermore, the tools available on an iPad, such as various brushes, textures, and layers, can offer a level of precision and control that may be difficult to achieve with traditional hand-drawing methods. This can be particularly advantageous in architecture, where accuracy and precision are critical.
In the end, whether an artist chooses to draw traditionally or digitally, what matters most is the final outcome – a well-executed, visually appealing drawing that communicates the intended message or idea effectively.
Download Procreate File
Procreate file: The process and development were presented at the Sketching Retreat 2022.
Looking for a PSD? Download it here.
Download
Depiction’s most used drawing brushes for Procreate

Download
Base colors for watercolor rendering

Quick Drawing and
Rendering Tutorials
Tree Drawing
Night Rendering
Digital Watercolor
Award of Excellence – Architecture in Perspective 36
AMERICAN SOCIETY OF ARCHITECTURAL ILLUSTRATORS
Title: Hotel Expansion
Location: Pinehurst, North Carolina
Client: Cooper Carry
Importing Google Earth
Using Photogrammetry

Creating a Digital
Watercolor Sketch
Congress of New Urbanism 28
A Virtual Gathering
Art Room:
The Art of Observing and Analyzing the City
Plein Air Techniques
Live Presentation June 11, 2020
Download
Procreate File, Color Palette, Procreate Brushes, and Texture

Creating a Rendering: Step 1
Setup for the Preliminary Drawing
Creating a Rendering: Step 2
Preliminary Sketch
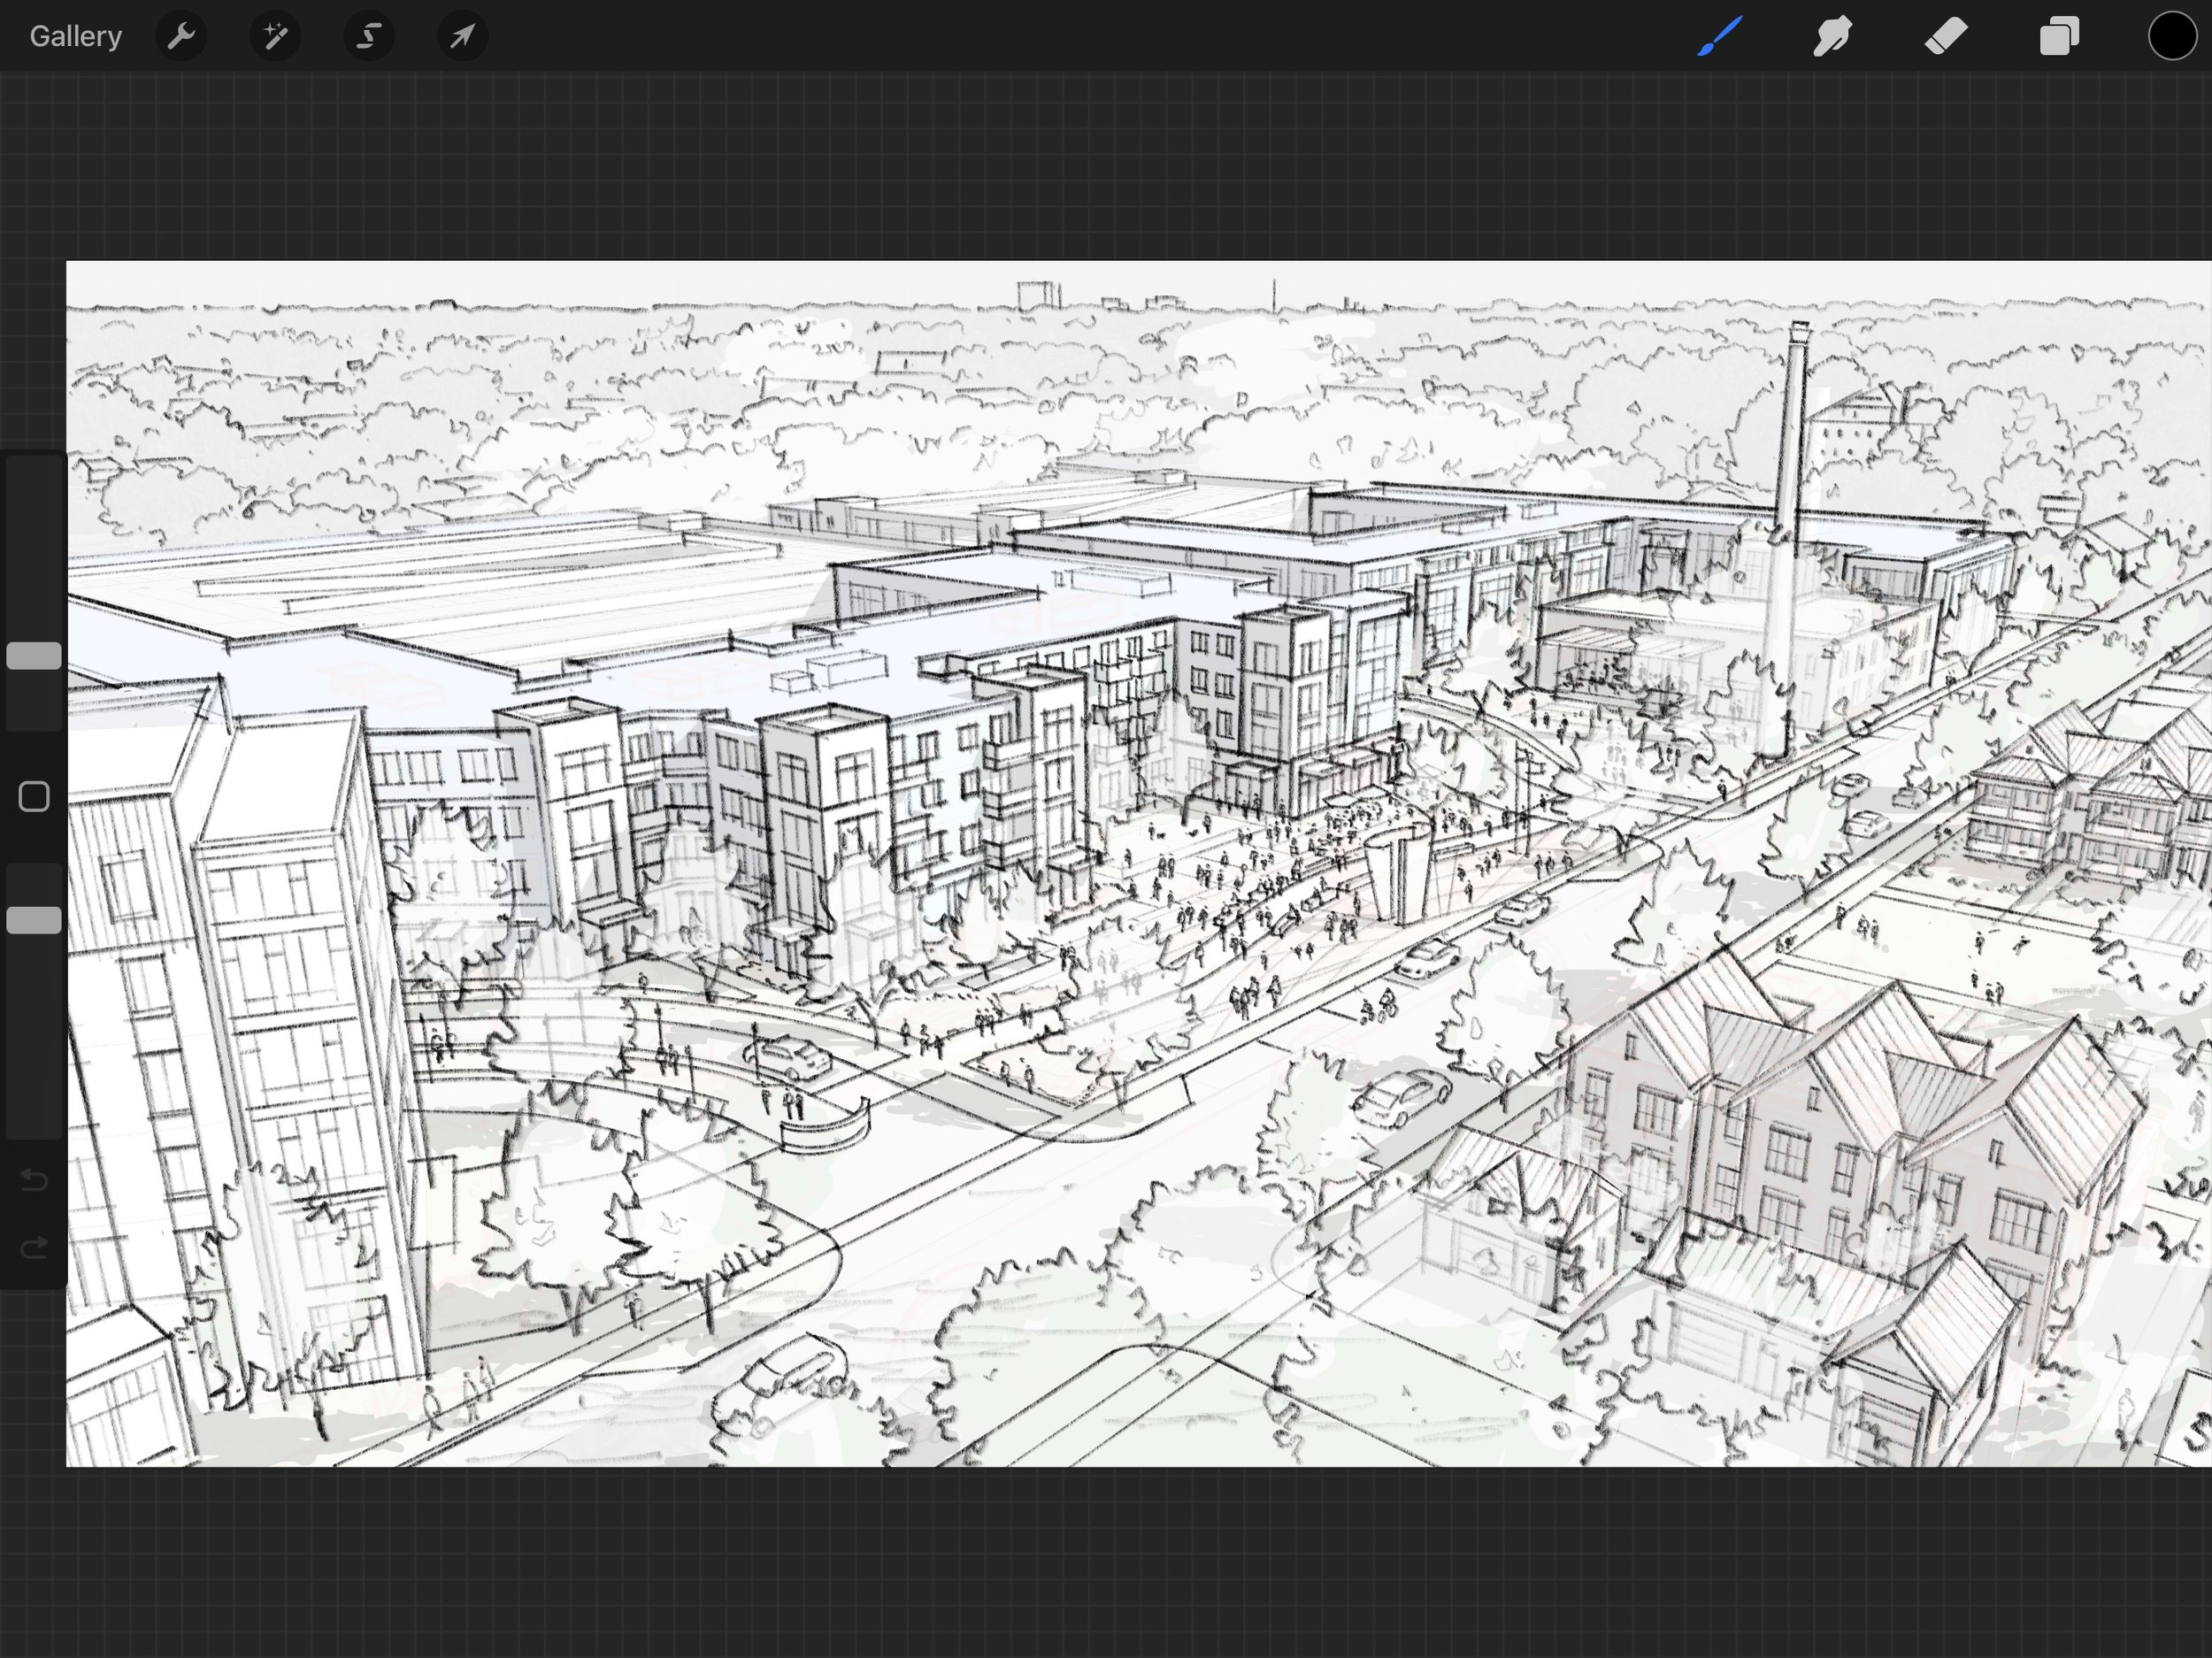
What is a rough preliminary sketch?
Preliminary sketches are created before the final line art. These sketches are used to better define the composition and are sent to the client for approval. It is important to remember to keep these sketches loose and fluid - they are intended to only give a rough idea of the final composition.

1) Import the JPEG of the SketchUp export into Procreate. Our files are typically sized at 4800 x 2700 pixels and include pictures of trees and people.
2) Create a new layer and fill it with white. Adjust opacity so the underlying SketchUp layer shows through. We set our opacity to about 75%.
3) Begin to trace the SketchUp model. At this stage there are a few things to keep in mind:
Each object should have just enough detail that it is recognizable, but not so much that it looks fully rendered. Most objects can simply be outlined with a few additional interior lines.
Make sure objects are proportional to the buildings. It is incredibly important to make sure all objects sit correctly in perspective in order to preserve an illusion of depth.
Keep in mind the focal point of your sketch. In our example, we made sure that the movement of the figures enhanced the visual pathway created by the buildings. Pay attention to the direction of the people and objects in your composition.
Try to tell a story with your sketch. For example, when drawing our sketch we considered the type of community being built and how the objects within the composition reflected that environment. In our case, we added planters and awnings to make the sketch feel more residential.
4) Adjust the opacity of the white underlay layer to 100%. make any corrections necessary and label the final drawing. See below the example of the finished rough preliminary drawing.